


Samsung NX1000 Full spectrum UV & IR conversion
I was after a cheap high resolution camera/sensor that could easily be adapted to full spectrum sensitivity (sensitive to infrared and ultraviolet light), would let me get optics close to the sensor (e.g. didn’t have all the mirror & gubbins of an SLR), had a relatively large sensor size, had decent video and manual exposure control, and ideally buttons so that I could interface the system with some custom hardware that mimics button presses if necessary. The Samsung NX1000 seemed to fit the bill; a 20.3 MP APS-C size sensor, cost about £70 second hand. Most CMOS & CCD sensors are a bit sensitive to UV and highly sensitive to IR, but manufacturers place a filter in front of the sensor to block these usually unwanted wavelengths out. This filter can be removed and then UV pass, visible pass and IR pass filters can be placed in front of the lens to photograph in any desired wavelength band.
The result of the NX1000 conversion is great. I’m very impressed by the quality of this camera’s photos, and its sensitivity to UV is pretty good – it seems about half as sensitive as my Canon 7D with the same lens and ISO, and perfectly able to film in UV on a sunny day with minimal noise.
I’ve mostly been testing with a Novoflex Noflexar 35mm lens. A great UV lens with minimal chromatic distortion betwen visible and UV.
Tools
- Small cross-head screwdriver
- Hex key
- Something to prize up the casing (e.g. tough fingernails or a screwdriver with a bit of insulation tape over the end)
- Strong plastic tweezers, or metal tweezers with the ends protected with insulation tape
- Digital calipers (optional – useful for aligning sensor)
- Black PVC insulation tape (for extra light blocking)
Warning
Taking apart the camera body down to the sensor involves undoing the three screws that control the position of the sensor in the focal plane of the lens. This is set in the factory and if you move these screws you might struggle to get a uniform focus ever again. Even more of a danger is tearing a ribbon or damaging the electronics by accident, so don’t do this unless you’re aware of the risks.
Dismantling the body
Take out the battery & SD card for safety & to avoid short circuits.
Unscrew all the required screws. There are two screws on the right side of the body (one under the USB flap), one on the left, and three on the bottom (you don’t need to undo the screw nearest the front of the camera next to the tripod mount). Very gently prize off the rear casing with the screen. Don’t pull too hard because there’s a ribbon to undo that you might tear (at the top right of this photo). Use the tweezers to very gently pull the ribbon out of its connector. Some (but not all) of the ribbon connectors have a flap you need to pull up to release the ribbon:
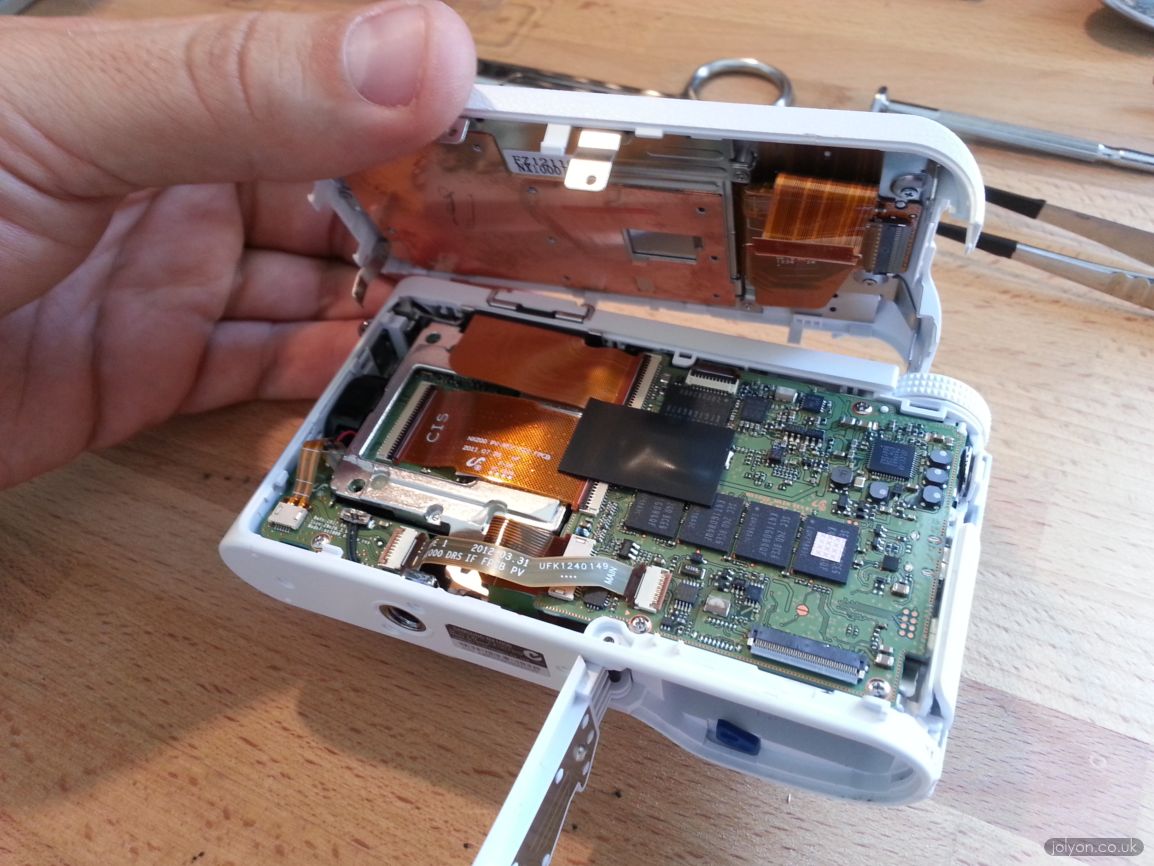
Keep undoing more ribbons:
Next, prize off the little metal cover on the flash shoe to reveal the two screws underneath and undo these screws:
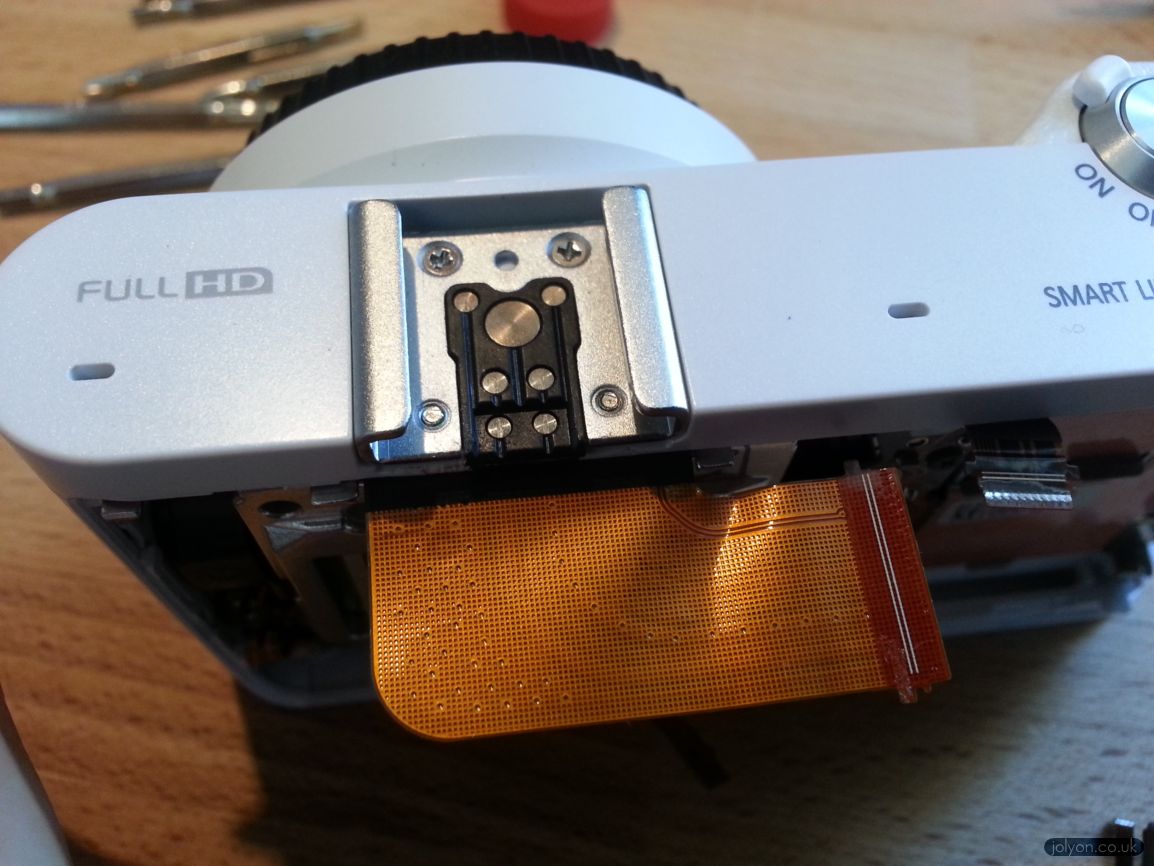
Now you can take the top casing off:
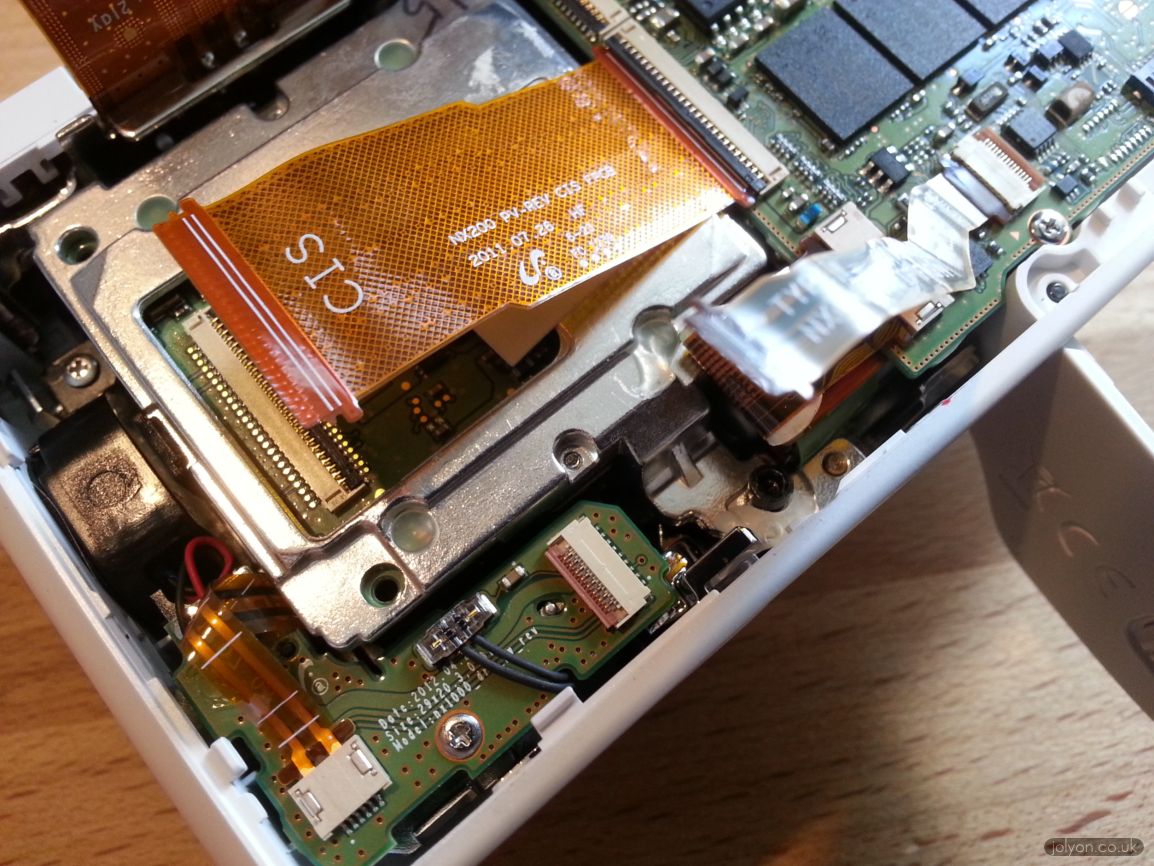
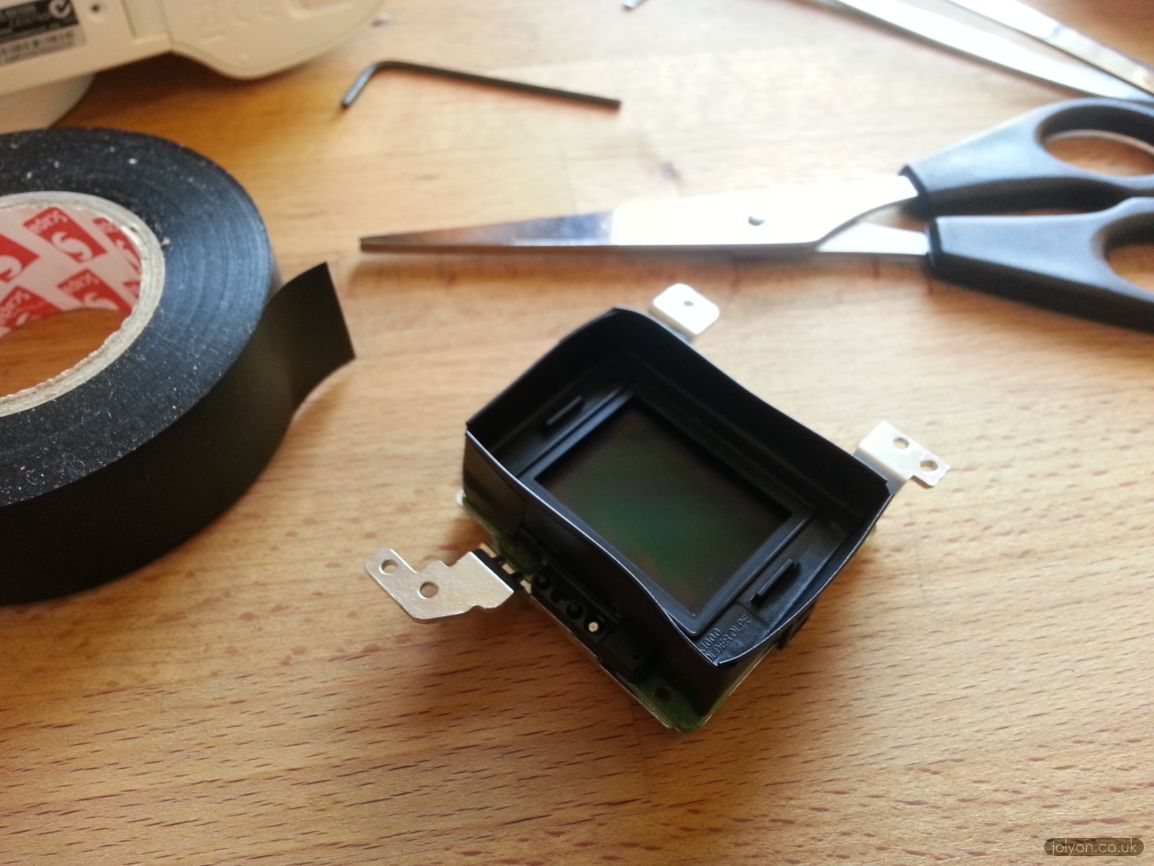
Once you’ve disconnected all the ribbons in the way (and one power connector) you’ll have access to the three hex screws securing the sensor housing. These tighten into springs to set the precise position of the sensor.
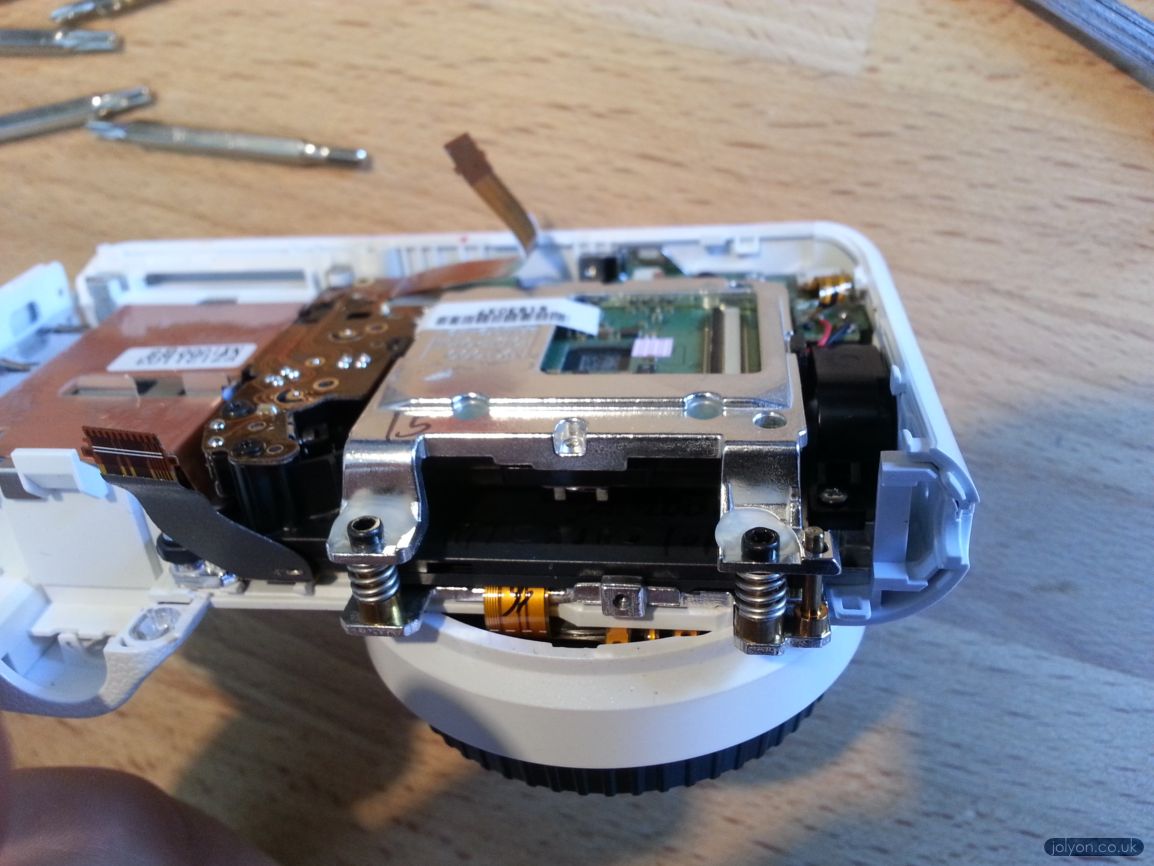
I used digital callipers to measure the distance between the sensor housing and the camera chassis (the length of the springs in the above photo). I made a note of these distances so I could re-set them later. Removal of the filter causes a change of focus, you can restore normal focussing by moving the sensor 0.6mm closer to the lens than these values you just measured. The distances for the screw at the bottom of the camera can be measured with the other end of the callipers (because there’s not space to get the normal end of the callipers in), measuring against the plastic casing.
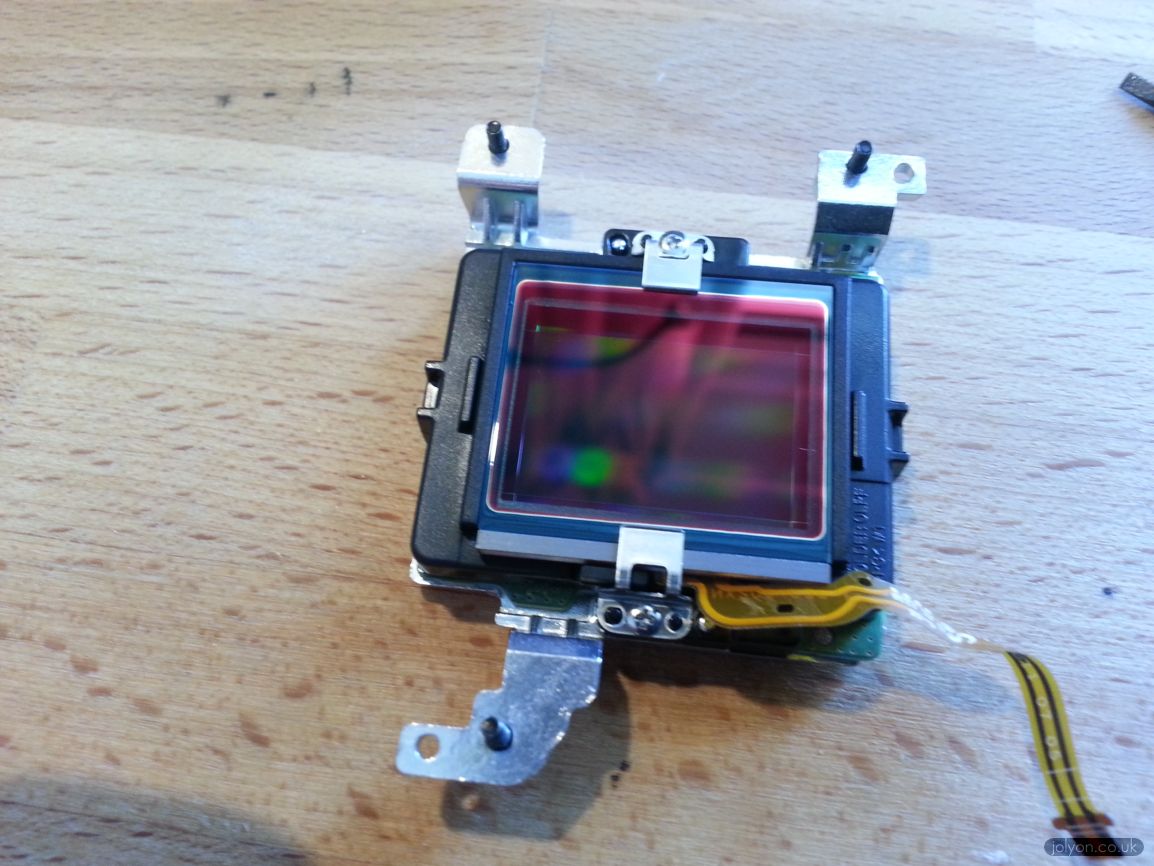
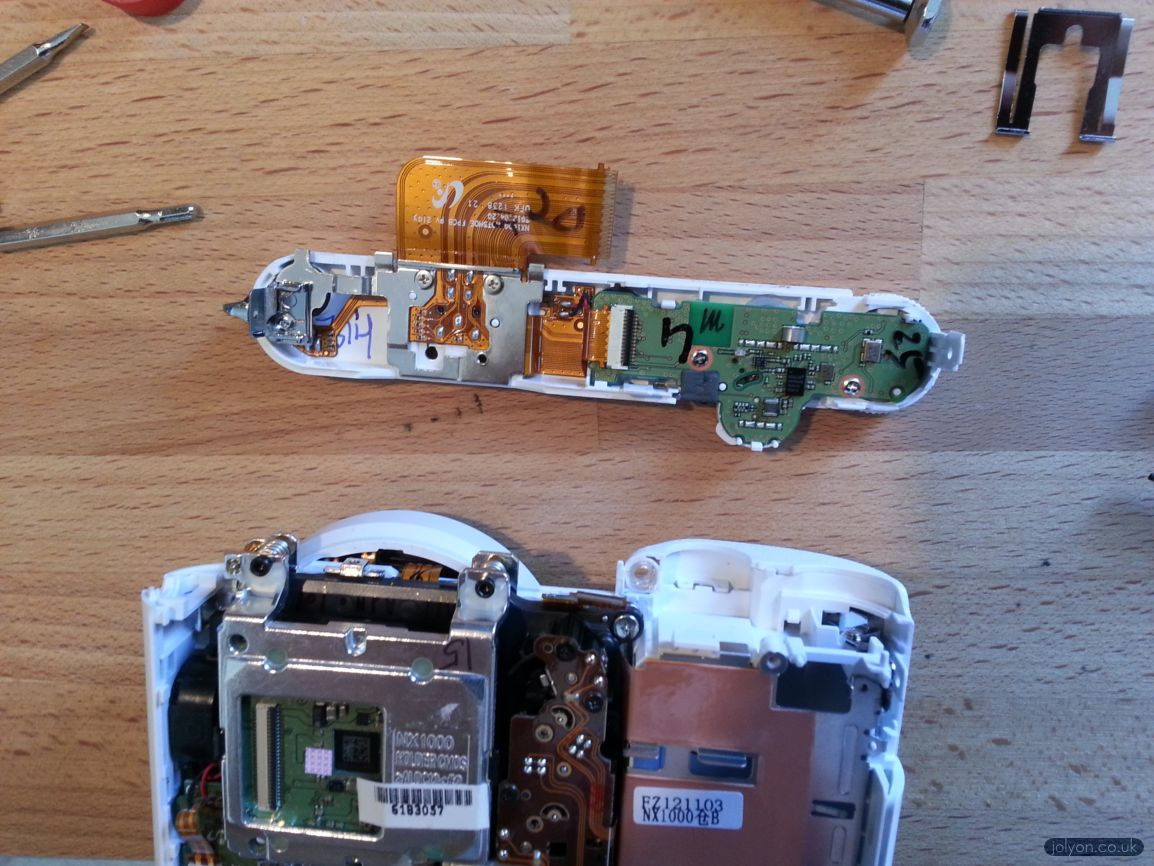
Finally you can undo these three screws and take off the sensor housing. Remove the two little screws securing the sonic dust cleaner and IR/UV blocking filter.
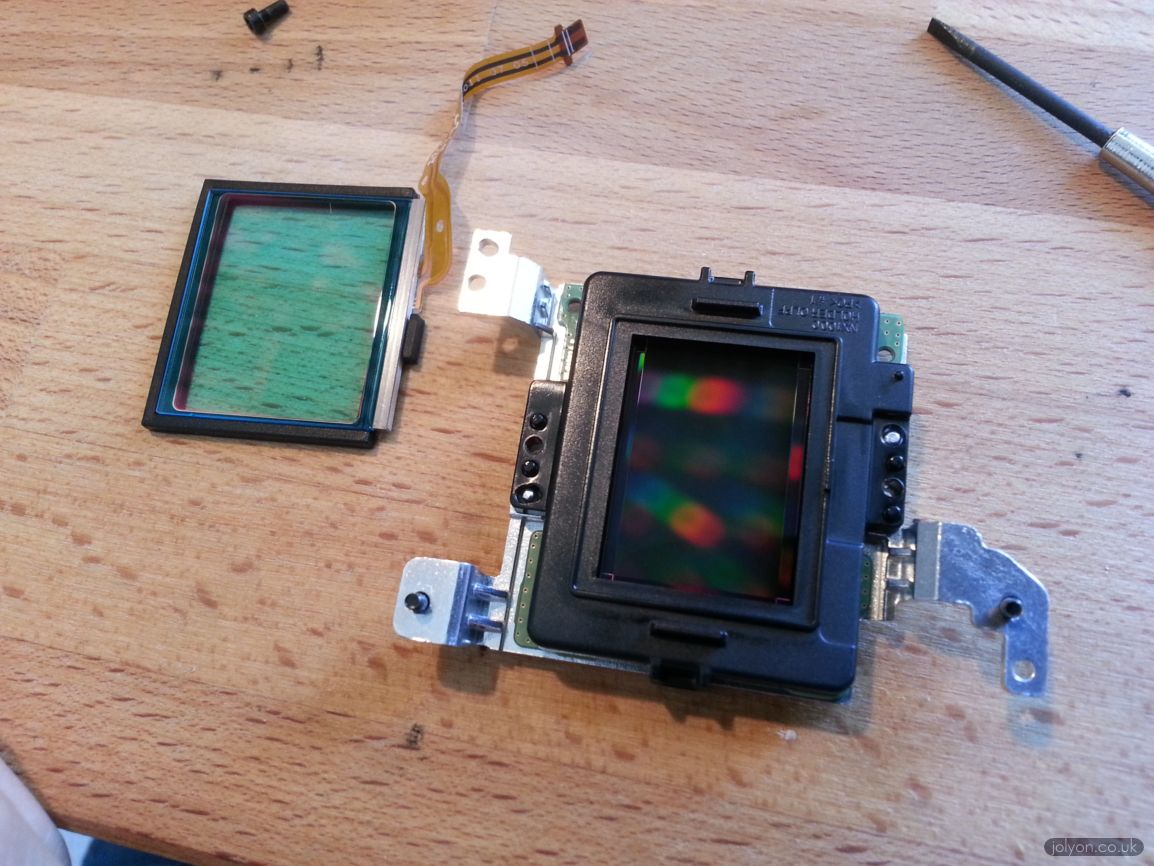
I removed both the IR/UV blocking filter and the sonic dust cleaner for maximal spectral sensitivity. Camera conversions would now often replace the filters with a clear (e.g. quartz) filter for protection and to restore (roughly) the same refractive index in front of the sensor. But I’m using manual lenses with plenty of freedom to move the lenses back and forth, so didn’t bother sourcing the clear filter and it focuses perfectly.
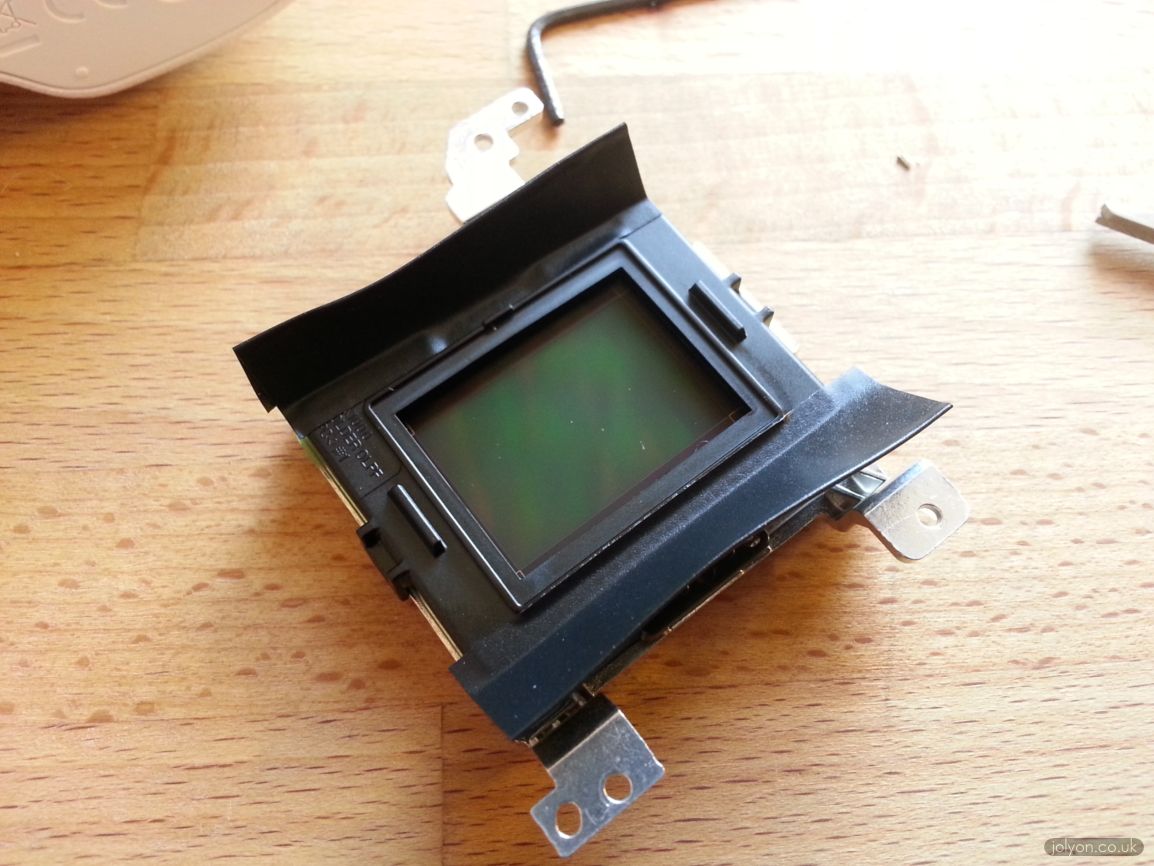
This conversion revealed a fair amount of light leaking onto the sensor from the camera itself. This only occurred on long exposure shots, and resulted in a bright haze on the image. This was presumably due to light from the camera’s circuitry and screen. To remove the effect I used some black PVC insulation tape to make a light-blocking skirt around the sensor.
Make four flaps, folding the tape back on itself.
Finally, make cuts in each corner of the skirt so that the skirt can fold away from the camera body. About 5mm from the plastic should do.
This modification completely stopped light bleeding onto the sensor from elsewhere and takes long exposures perfectly.
Hi,
i have also converted the NX1000, but have the follow Problem. After Whitbalance the Raw the Picture is nearly black and white. Thats good, but onthe right side is the picture some read and on the left side some blue. I have allready tried to minimum the effekt. But I have now no hope to reduce the effekt. I Tink now it comes from a Reflektion from the last Lens of the Objektiv.
Have you a good Info for me ?
Interesting problem! I think it unlikely the problem is caused by the optics if the photos look normal on an un-coverted camera. Optical effects would be radial (creating circular artefacts), so you might get red vignetting at the edges (I have this on a very wide-angle lens not designed for digital sensors). But this wouldn’t cause one side to be red and the other blue as you have.
Does the effect get worse with longer exposures? If so then the problem is most likely to be from light bleeding onto the sensor from the inside of the camera itself (or even light getting through the camera body somehow). This is what the little “skirt” made of black tape aims to block out. You could try making a skirt with other materials like black sponge or something. I found that the light bleeding in was most prominent at the bottom left of the photographs.
Hi,
I have expierienced more then 20 hours. All AF Optics from Samung shoes after Whitebalance the Raw (only in Silky Pics) and Cannal swap on the ride side Red , onte left green pics. I have convertes the camera more than 10 times (with new IR filter, without…..) And now i had found the Problem. See you the coating on the last Lens from Optics. You can see different Colors. These Colors are on the pic. With an old M42 Optics without Coating it is perfekt. Its a shame. By my older NX100 there is no such effekt.
Sounds odd. Though the green channel is very insensitive to IR light, so this may be an artefact caused by the lens coatings and internal reflections that are magnified by increasing the gain massively on the green channel when you set the white balance.
With IR photography I usually ditch the green channel completely as it will normally just add a load of noise.
A well put together article but unfortunately my problem is with the lens 20-50 which was jammed when i bought it but i broke the ribbon in the lens , the one that makes contact with the terminals in the camera and i don`t know its proper name. Question is do you know where i could buy a replacement.
Hi Henry, I’m afraid I’ve no idea how to buy replacement ribbons. If there aren’t too many contacts you might be able to use an old hard drive IDE cable. These have 40 (I think) wires, so you can cut them down to the number you need. Good luck fixing it!
Hi Jolyon
Thank you for your very detailed tutorial.
After converting the camera, do I need to use a UV pass filter with it?
Hi Vinicius, yes you would need a UV pass filter for taking UV photos (plus a UV/IR blocking filter to take ‘normal’ photos). The only UV filter I’m aware of that actually works without an infrared leak is the Baader Venus-U filter. It’s fairly expensive, but I simply haven’t found anything else that matches it. A tiny IR leak will easily overwhelm your camera sensor, which is much more sensitive to IR than UV.
Thanks for the great instructions. I’ve converted my camera and have a novoflex noflexar lens and Baader 2″ filters. Do you usually 3D print the slider to switch between filters? If so, would you consider adding the file to print them to your already amazing resources for UV photography?? Many thanks.
I’m afraid getting the threading to work requires a milling machine. I’d happily send you the plans I have, but you’d need a machinist to make it for you.
I’m planning to start selling the filter sliders as they’re difficult for most people to make themselves (and they make the photography a LOT easier).
Cheers,
Jolyon
I’d love the plans for a 3d printed soldier, if you are happy to share them! I think there a milling machine and someone to run it at my uni. Or if you are already selling the sliders, I’ll buy one! Many thanks.
(solider was meant to be slider!)
Hi Jolyon
My NX1000 doesn’t have any screws in the flash shoe and I can’t find an obvious way to release the top panel. Any ideas?
Yes – they’re hidden! You need to slide the little metal cover off the flash shoe base!